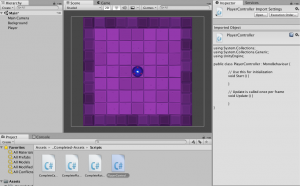
Today I used Unity Learn to learn how to edit sprites and add properties to them. I also learned bout two camera typer, Perspective and Orthographic. Orthographic is used for 2d terrains, while perspective is used for 3d terrains.
Surprise! Another Cat Photo! by Michael Scialdone on Flickr.com
What makes a great presentation? Why are some presenters more engaging than others? We will begin to explore these questions with this project. Below you will find the steps and examples each component of the project. Your blog post should have each of these sections with the required images or links and text. Be sure to check your spelling and grammar!
Creating and Formatting The Blog Post Overview Video
Step 1 – Summary of Project
Imagine you’re in class, and your teacher starts to ramble on about parabolas and old books and blah blah blah, then suddenly you wake up because you slept for five minutes! If you read the next 9 steps of my blog post, you can understand what makes a presentation enjoyable, and what keeps people interested in your project.
Step 2 – What is Good Presentation?
Core message is most important.
Highlight what helps support your message and what to include in your storyboard.
Always link back to core message.
Identify the core and its structure.
Try and isolate yourself from technology so you can think.
Use Creative Commons and correct citations to use pictures in your presentation.
The quality had a black background with bright words so that it popped at the audience.
A good presentation has a mix of Entertainment, Unexpectedness, Storytelling, Creativity, and other elements of the SUCCESs acronym in order to keep the audience entertained. You want to have a good presentation in order to get your idea across or people to remember what your point was.
Step 3 – Brainwriting and Brainstorming Ideas
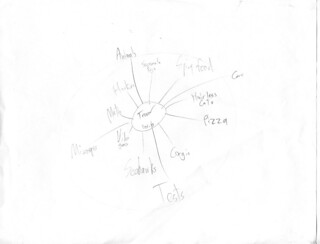
Brainstorming is coming up with what our main ideas are in our presentation. It is important to brainstorm ideas because it will make constructing the presentation easier. Brainstorming helps us think about what the main ideas are in our presentation. These main ideas are our focus points of what to write in our presentations.
Step 4 – Creating the Storyboard
Creating a storyboard means laying out our presentation in a rough drafts, so that we can make edits to them right then and there. Creating a storyboard is helpful in this project because you can then easily make the entire presentation right after. It also helps point out mistakes or places you want to change.
Step 5 – Gathering and Citing Images
Copyright is giving credit to people who made things that you didn’t make. With Creative Commons, the people on there said, “you can use my image, just cite me in the ‘works sited’ slide,” and you can use the image in your presentation, you just have to give the person credit.
Step 6 – Creating the Master Slide
I changed the master slide in order to have it centered and large because it pops out at the audience more. If it’s off the the side, it’s not that interesting. But when it’s right in your face you can see it and feel it.
Step 7 – Building the Slide Show
I placed all of the text in my presentation first because I wanted to make sure I had gotten all of my kings across and fix any errors I could’ve had. It is important to lay out the words before you add pictures because listening is more powerful than seeing, and it is important to have strong word placement as well as some pictures.
Step 8 – Sharing the Slide Show
Link to my slideshow – https://www.slideshare.net/mobile/secret/MxsExN8uNiKk7G
I used this process because I wanted you guys to see the techniques I used in my presentation.
Step 9 – Preparing to Present/Pitch
Gossip, Judging, Negativity, Complaining, Excuses, Exaggeration, Dogmatism. (Confusion of Facts/opinions) = NOT LISTENING
Honesty, be clear
Authenticity, act like yourself
Integrity, be your word
Love, be kind
Talk in your chest, not in your throat.
Avoid being repetitive or monotone.
Slow down, be calm.
Powerful Speaking -> Conscious listening
Creating -> learning
2 minutes of high power poses
Raises testosterone
Nonverbals can change how our brains think
Step 10 – What I Learned
I have learned lots of tips and techniques throughout making this presentation. I have learned things like how to be more confident when presenting, how to keep an audience entertained, what makes a presentation pop, and many other important tricks. These techniques will help me in the future with job applications, presenting new ideas, and even public speaking.
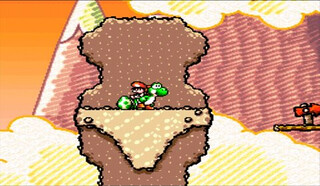
This game represents me as a person because in the game, Mario is navigating through levels to save the princess, kind of like how I am navigating through school to get to College / get a job. And the bosses could represent Finals and Exams. It also is special to me because it is the first video game I had ever played, and I have fond memories of me and my cousin playing this at my grandma’s house. My favorite part of the game is the Ghost Boss fight pictured above. A quick synopsis: Mario navigates through levels, defeats bosses, and activates switch palaces in order to save Princess Peach.